A dead battery can be jump-started with another car battery of similar capacity. To jump-start a car, you’ll need jumper cables and a functioning battery. This method is effective when a car is not starting due to a low or dead battery.
When to Jump Start a Car ?
If a car is not starting and the primary suspect is a low or dead battery, attempting a jump-start is a common solution.
A flat battery is often indicated by a weak or non-existent engine crank when you turn the key, along with dashboard lights flickering upon ignition and the radio or music system not working.
However, before attempting a jump start, it’s advisable to test the battery to confirm if it is indeed low or dead. This helps ensure you’re addressing the correct issue.
How To Test a Car Battery ?
A car battery can be tested to determine if it’s dead or not. There are two ways to test a car battery:
- Test with a Multimeter: Use a multimeter to check the voltage of the car battery terminals. A healthy battery should read around 12 volts.
- Test Without a Multimeter: If you don’t have a multimeter, you can often gauge the battery’s condition based on the several indicators.
Checking for corrosion on the car battery terminals is also crucial. Corrosion can disrupt the electrical power supply to the starter, mimicking the symptoms of a low or dead battery. If your car is not starting due to corroded terminals, simply cleaning the battery terminals can often resolve the issue.
How To Jump Start Your Car ?
Jump-starting a car involves using a set of jump leads or jumper cables to transfer energy from a functioning battery to a dead or flat battery.
It’s crucial to follow the correct steps when jump-starting a car to prevent damage to the electrical system. Here’s a basic guide on how to prepare for a jump-start:
- Use only a 12–volt supply to start your vehicle.
- Do not disconnect the battery of the disabled vehicle as this could damage the vehicle’s electrical system.
- Park the booster vehicle close to the hood of the disabled vehicle making sure the two vehicles do not touch. Set the parking brake on both vehicles and stay clear of the engine cooling fan and other moving parts.
- Check all battery terminals and remove any excessive corrosion before you attach the battery cables. Ensure that vent caps are tight and level.
- Turn the heater fan on in both vehicles to protect any electrical surges. Turn all other accessories off.
How To Connect Jumper Cables ?
When connecting jumper cables, it’s crucial to follow extra safety measures and the correct procedure. Any minor error during this process can potentially lead to damage to the vehicles involved and even pose risks to the people handling the operation.
Here are the step-by-step instructions with pictures on how to correctly connect the jumper cables:
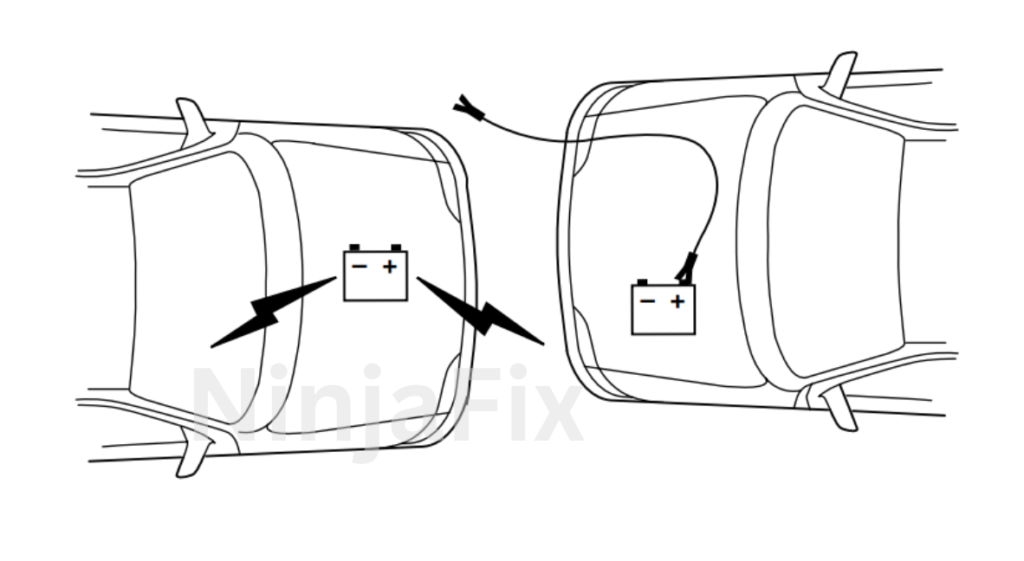
Step 1 :
Connect the positive (+) jumper cable to the positive (+) terminal of the discharged battery.

In the illustrations, lightning bolts are used to designate the assisting (boosting) battery.
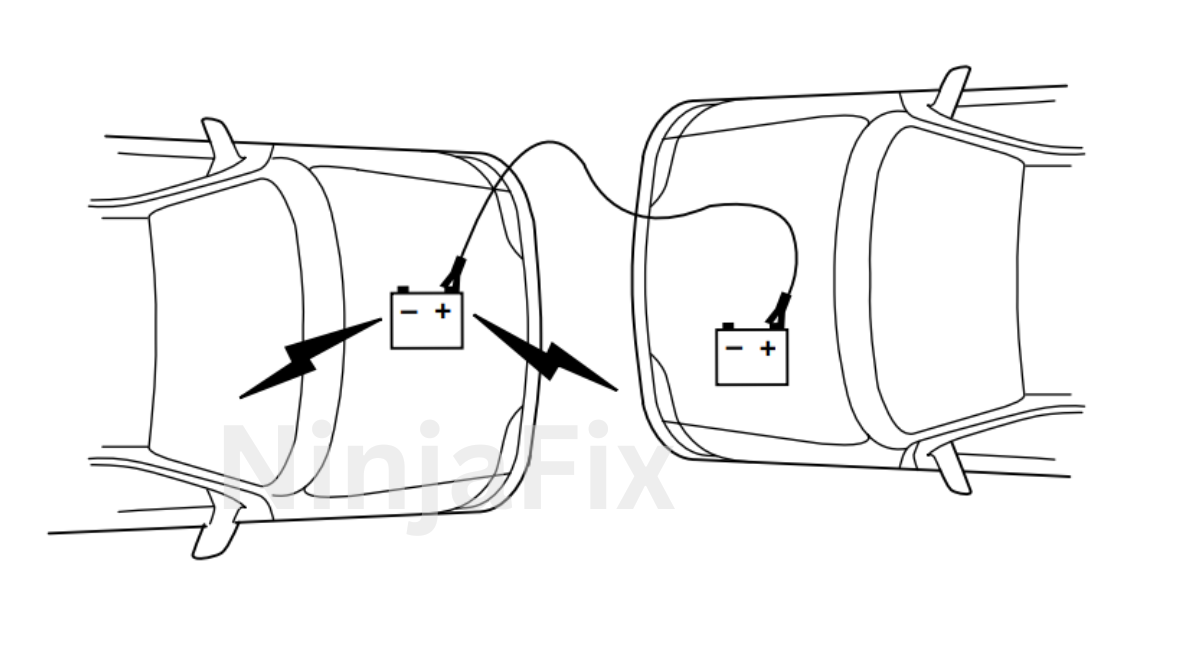
Step 2 :
Connect the other end of the positive (+) cable to the positive (+) terminal of the assisting battery.

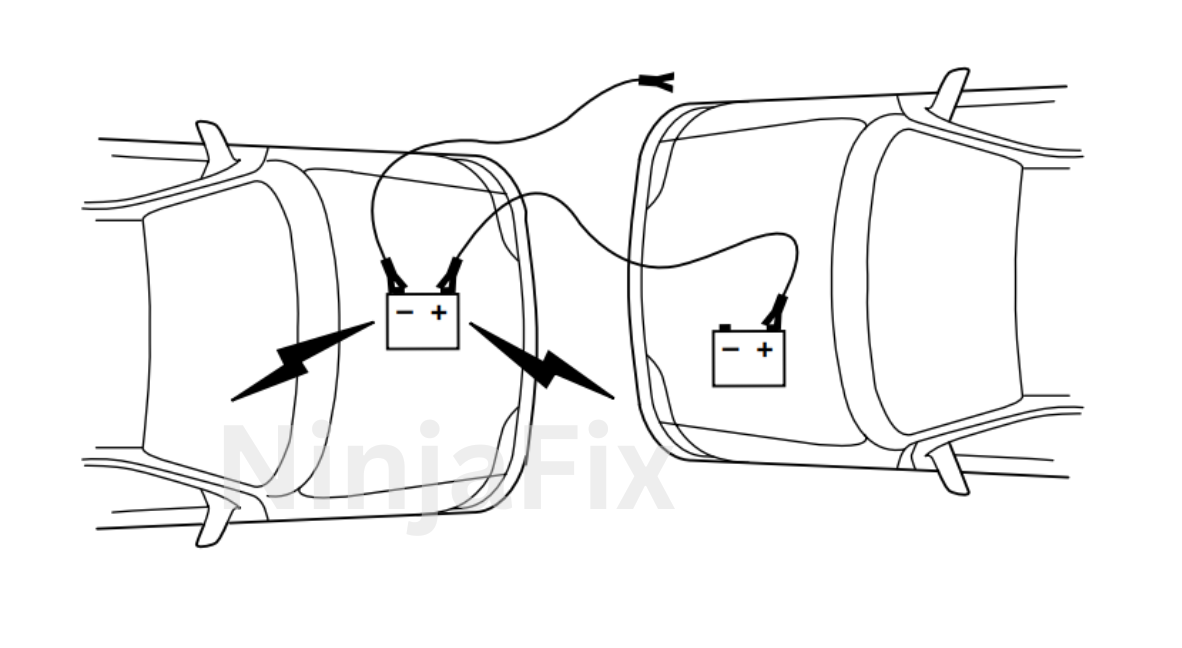
Step 3 :
Connect the negative (-) cable to the negative (-) terminal of the assisting battery.

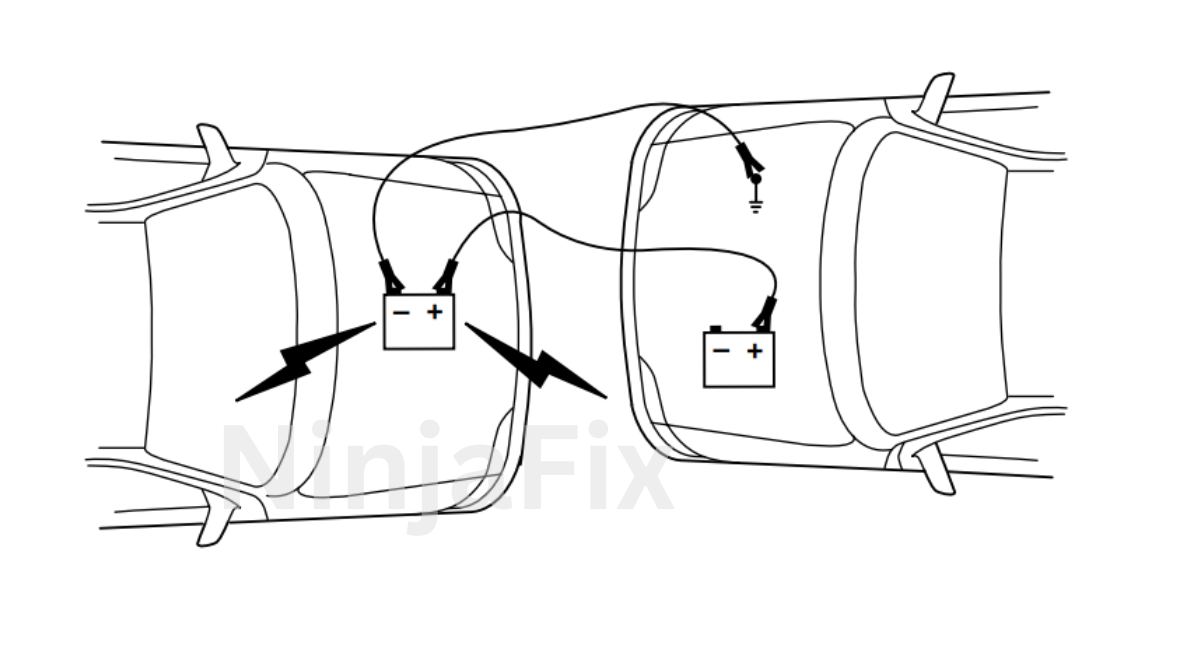
Step 4 :
Make the final connection of the negative (-) cable to an exposed metal part of the stalled vehicle’s engine, away from the battery and the carburetor/fuel injection system.
Do not use fuel lines, engine rocker covers or the intake manifold as grounding points.

Do not connect the end of the second cable to the negative (-) terminal of the battery to be jumped. A spark may cause an explosion of the gases that surround the battery.
Step 5 :
Ensure that the cables are clear of fan blades, belts, moving parts of both engines, or any fuel delivery system parts.
Jump Starting
Step 1 :
Start the engine of the booster vehicle and run the engine at moderately increased speed.
Step 2 :
Start the engine of the disabled vehicle.
Step 3 :
Once the disabled vehicle has been started, run both engines for an additional three minutes before disconnecting the jumper cables.
How To Remove Jumper Cables?
Remove the jumper cables in the reverse order that they were connected

Step 1 :
Remove the jumper cable from the ground metal surface.

Step 2 :
Remove the jumper cable on the negative (-) connection of the booster vehicle’s battery.

Step 3 :
Remove the jumper cable from the positive (+) terminal of the booster vehicle’s battery.

Step 4 :
Remove the jumper cable from the positive (+) terminal of the disabled vehicle’s battery.
After the disabled vehicle has been started and the jumper cables removed, allow it to idle for several minutes so the engine computer can relearn its idle conditions.
Why won’t My Car Jump Start ?
If a car still won’t start after attempting a jump start, there could be various reasons behind it. The specific cause for a car not starting depends on the symptoms it’s exhibiting. Generally, a car can show two primary symptoms: it’s either cranking but not starting, or it’s not cranking and not starting at all. In both cases, diagnosing and resolving the issue may involve inspecting different systems.
- No cranking at all: If the car doesn’t make any noise when you turn the key (no cranking), there could be problems with faulty wiring, blown fuses, or other electrical issues, as well as sensor malfunctions.
- Cranking But Won’t Start: If the car cranks but doesn’t turn over and start, this could be indicative of problems with the fuel system. Issues with the fuel pump, fuel pump relay, or fuel pump fuse, as well as ignition problems, could be the culprits.
Conclusion
If your car is not starting due to a low or dead battery, you can get it up and running by jump-starting the vehicle. Jump-starting a vehicle is a useful skill, but it must be carried out safely and correctly. Connecting the jumper cables in the right way is crucial for a safe and effective jump-start.

